
If you’ve ever run your hand across a piece of furniture and felt that glass-smooth, almost buttery surface — chances are a hand plane did that work, not sandpaper. Planes are one of the oldest, most respected tools in woodworking, and yet most beginners skip right past them and go straight to power sanders. Big mistake.
In this guide, we’re breaking down everything you need to know about planes in woodwork — what they are, the different types, how to use them, and how to actually get good results without wasting money on the wrong tool. Whether you’re building your first cutting board or you’re deep into furniture making, this is the guide that will save you hours of frustration.
And if by the end of this article you decide you want a shortcut to mastering woodworking projects (planes included) with step-by-step plans instead of guessing your way through it, check out this complete woodworking plans package — more on that toward the end.
What Is a Hand Plane, Exactly?
A hand plane is a woodworking tool used to flatten, smooth, and shape wood by shaving off thin layers with a sharp blade (called an “iron”). Think of it as a precision razor for wood. Unlike sandpaper, which grinds material away, a plane slices it — leaving a cleaner surface, tighter joints, and far more control over the final shape.
Planes have been used for thousands of years, long before electricity, and they’re still a staple in professional workshops today because no power tool replicates the control a well-tuned hand plane gives you.
Why Planes Still Matter in Modern Woodworking
You might be wondering — with routers, planers, and sanders everywhere, why bother learning hand planes at all?
Here’s why serious woodworkers still swear by them:
- Precision control — you can remove material in shavings thinner than paper.
- Better joinery — planes let you fine-tune joints (like dovetails or mortise-and-tenon) for a perfect fit.
- No dust, no noise — unlike sanders, a hand plane doesn’t fill your shop with fine dust.
- Superior surface finish — a planed surface reflects light differently than a sanded one; it’s smoother at a microscopic level.
- Portability — no cords, no batteries, no setup time.
If you’re serious about leveling up your woodworking, planes aren’t optional — they’re foundational.
The Main Types of Woodworking Planes (And What Each One Does)
Not all planes do the same job. Here’s a breakdown of the essential types every woodworker should know about.
1. Block Plane
The block plane is small, one-handed, and incredibly versatile. It’s usually the first plane people buy because it’s affordable and useful for quick jobs like:
- Trimming end grain
- Chamfering edges
- Cleaning up small imperfections
- Fitting drawers and doors
If you only own one plane, this is probably it.
2. Smoothing Plane (No. 4)
This is the workhorse for final surface finishing. After your board is roughly flat, the smoothing plane takes those last few passes to leave a glass-smooth surface ready for finish. It’s shorter than a jointer plane, which lets it follow small undulations and clean them up.
3. Jack Plane (No. 5)
The “do-everything” plane. Slightly longer than a smoother, the jack plane is used for general stock preparation — knocking down high spots, rough flattening, and general dimensioning before you move to finer tools.
4. Jointer Plane (No. 7 or No. 8)
This is the longest bench plane, and it’s built for one job: making long edges and surfaces dead flat and straight. It’s essential when you’re joining boards edge-to-edge (like for a tabletop) and need a seamless glue line.
5. Scrub Plane
Built for aggressive stock removal. If you’re hogging off a lot of material fast — think rough-sawn lumber — the scrub plane’s curved blade takes thick shavings quickly. It’s not about finesse here; it’s about speed.
6. Shoulder Plane
Designed for precision work on joinery — specifically cleaning up the shoulders and cheeks of tenons, rabbets, and other tight-tolerance cuts. The blade extends the full width of the tool, letting you cut right into corners.
7. Router Plane
Don’t confuse this with a power router. A router plane is used to cut consistent-depth grooves and clean up the bottom of dadoes, housings, and hinge mortises. It’s a precision tool for tasks where “close enough” isn’t good enough.
8. Rabbet Plane
Specifically built to cut rabbets (step-shaped grooves along an edge) — commonly used for cabinet backs, drawer bottoms, and picture frames.
How to Choose the Right Plane for Beginners
If you’re just starting out, don’t buy eight planes at once. Here’s a practical buying order:
- Block plane – cheap, versatile, immediate use
- No. 4 smoothing plane – for finishing surfaces
- No. 5 jack plane – for general dimensioning
- Jointer plane – once you’re doing edge-joining for tabletops or panels
Everything else (router planes, shoulder planes, specialty planes) can wait until you hit a project that specifically calls for them.
How to Use a Hand Plane Properly (Step-by-Step)
Even the best plane in the world won’t help if it’s not set up correctly. Here’s the basic process:
- Sharpen the blade. A dull iron is the #1 reason beginners think planes “don’t work.” Your blade should be sharp enough to shave hair off your arm.
- Set the blade depth. Start shallow. You want thin, consistent shavings — not thick gouges.
- Check the sole is flat. An unflattened sole (especially on cheaper planes) will fight you the whole way.
- Work with the grain. Planing against the grain causes tear-out. Watch the wood surface as you go and adjust direction if it starts chipping.
- Use consistent, full-length strokes. Short, choppy strokes create uneven surfaces.
- Take light passes. It’s always better to make several thin passes than one aggressive one.
Common Mistakes Beginners Make With Planes
- Using a dull blade — sharpening is 80% of getting good results.
- Skipping sole flattening — many budget planes need tuning out of the box.
- Pushing too hard — let the sharp blade do the work, not your muscle.
- Ignoring grain direction — this is the #1 cause of tear-out.
- Buying too many planes too soon — master the basics with one or two before expanding your collection.
Hand Planes vs. Power Tools: Do You Need Both?
Short answer: yes. Power tools (planers, sanders, jointers) are great for speed and rough dimensioning on larger projects. But hand planes give you control that power tools simply can’t match — especially for fine joinery, delicate trim work, and final finishing touches. Most experienced woodworkers use a combination of both, leaning on power tools for the heavy lifting and hand planes for precision and finesse.
Why Following a Structured Plan Makes All the Difference
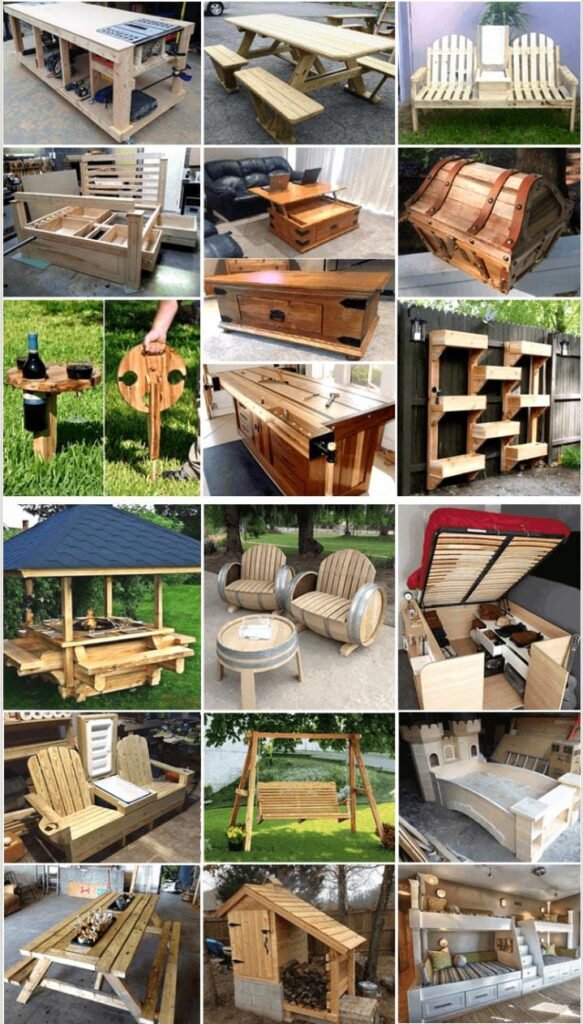
Here’s the truth: tools alone don’t make a project successful. Understanding when and how to use a jack plane vs. a smoothing plane vs. a router plane on a real project — with actual dimensions, joinery, and sequencing — is what separates a frustrating weekend from a finished piece you’re proud of.
This is exactly why so many woodworkers (beginners and experienced alike) rely on structured, step-by-step project plans instead of trying to figure everything out from scattered YouTube videos. A good plan tells you exactly which tool to grab at which stage, what dimensions to cut, and how the joinery comes together — planes included.
If you want a library of woodworking projects with clear instructions, materials lists, and diagrams so you’re never guessing what tool to use next, this resource is worth a look:
👉 Get instant access to the full woodworking plans collection here
It’s built for exactly the kind of woodworker reading this article right now — someone who wants to actually finish projects instead of stalling out on tool confusion.
You can also find it through this link:
👉 View the woodworking plans package
Final Thoughts
Planes in woodwork aren’t a relic of the past — they’re a skill that instantly upgrades the quality of everything you build. Start with a block plane, learn to sharpen properly, and build your collection as your projects demand more specialized tools. Master this, and you’ll notice the difference in every joint, every edge, and every finished surface you create.
If you’re ready to put these tools to use on real, guided projects instead of guessing, start here — it’s the fastest way to go from “I own a plane” to “I finished the project.”